Our Process
A BBB Accredited business since April 2000!
When you make your initial call to our office we will set an appointment to meet with you at your residence. The reason for this initial meeting is so we can asses your site where the pool will be located. At this meeting we will survey your yard and discuss what you are looking for in a pool design. We will give you ideas of things you may not have considered and establish a budget. Then we will take all the information with us back to our office and work up a design. We design all our projects on Pool Studio software and have been using it longer than any other builder in Oklahoma. After the design is completed we will have you come to our office to go over the plans, numbers and look at our different tiles and finishes. Once we agree to everything we get started!
This is a brief description of a typical pool installation. It varies somewhat on our more complex projects. Proper execution of each stage is critical to the success of the next stage.
#1 PLANS & PERMITS
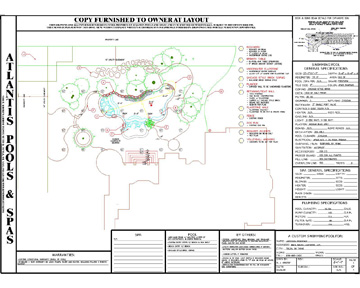
The Atlantis Process begins with a detailed plan from our AutoCAD department. This is the foundation for your project to be completed as you envision. We also secure all necessary permits.
#2 PRE-GRADE
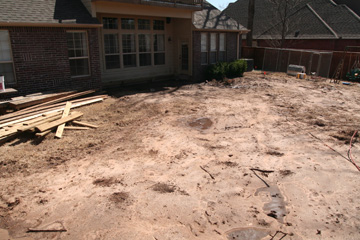
The actual construction process is underway! Any demolition required is completed at this time. We also pre-grade the pool area as needed to ensure the pool area is at the proper level for your pool's placement.
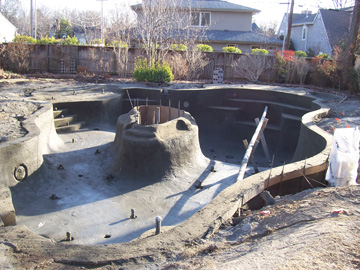
#3 EXCAVATION
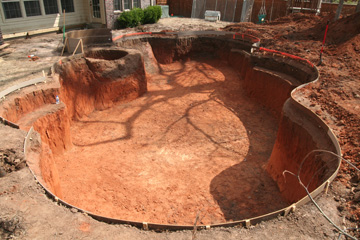
The swimming pool is formed to the proper elevation and excavated to the proper depths. At this point your pool is over-excavated by a foot to allow for the final structure. The complete pool is contoured by hand while excess soil is removed from the site.
#4 PLUMBING
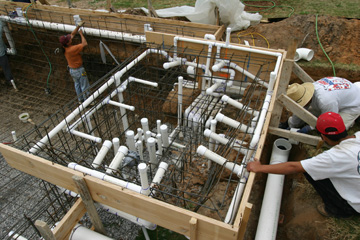
After excavation, all rigid schedule 40 plumbing is installed in the pool and spa. We use 3", 2.5" and 2" pipe. If you have decided to have the PVR in-floor pool circulation system installed, it is pre-plumbed at this time. All circulation pipes are pressure tested. Click on this link to see how the PVR in-floor system works!
#5 STEEL
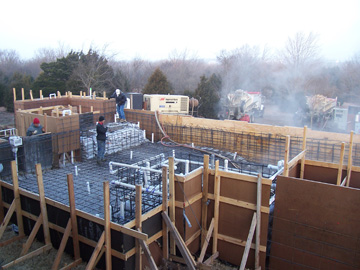
Before the steel is installed, a 4" to 6" layer of class 'A' gravel in spread over the floor of the pool. The skeleton of the pool is all grade 40 steel throughout. This is what holds the structure of the pool together. We use #3 and #4 bars according to the soil conditions and depths of your pool.
#6 GUNITE
After the steel is installed and passes municipal inspection, the shell of the pool is shot in place. A dry mix Gunite is pneumatically applied to ensure the correct density of the structure.
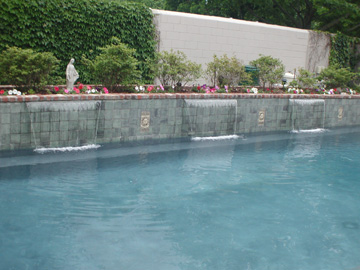
#7 TILE/COPING
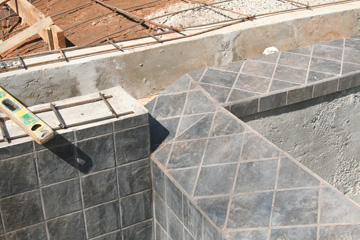
Tile of your choice is placed at the water line. Now it is really starting to look like a pool!
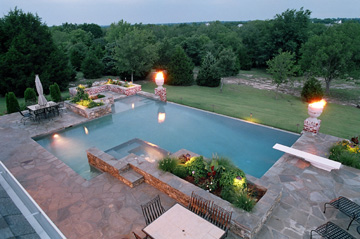
#8 DECK
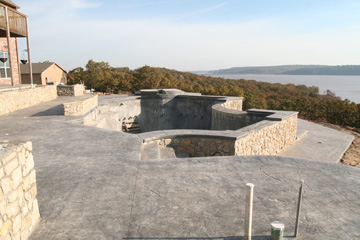
Your pool deck is now formed for pouring. The deck material chosen by you is now poured in place. We do everything from broom finished concrete to stamped to full masonry decking .
#9 EQUIPMENT
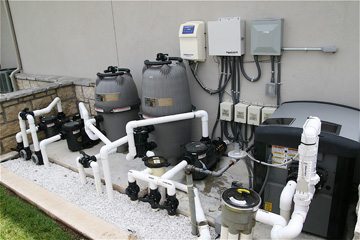
Pool filtration equipment is installed on the concrete pad that was poured at the deck pouring stage. All electrical hook-ups are using 240v pumps.
#10 PUNCH LIST
All punch list items are taken care of at this time. This ensures your pool is complete when filled with water.
#11 PLASTER
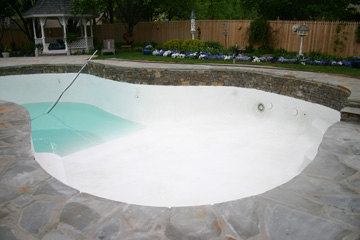
The swimming pool is now cleaned and prepared for the plaster. Once cleaned, two coats of marble plaster are applied. Filling the pool with water usually follows within a few hours.
#12 START-UP
Once your swimming pool is filled, one of our service technicians will come and start the equipment. Water is tested at this time and a chemical balance is started.
#13 INSTRUCTIONS
A convenient time for you and your spouse is set for pool school. Our technicians will explain complete operation of your particular system.
#14 ENJOY YOUR NEW POOL!
![]()
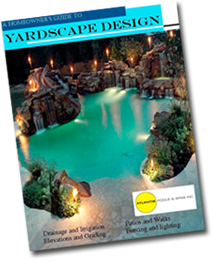
 Valuable Information Here!